Footpeg Modification
by Michael Wolf
When Concours owners let their beasts hit the pavement, bad things happen. One of the consequences of so-called asphalt surfing or even the occasional low speed driveway or parking lot drop are broken footpeg brackets. In this article, I'll outline a simple little procedure that you can do to help avoid those annoying, and quite expensive, cracked and/or shattered brackets and footpegs.
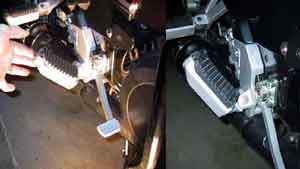
First, remove the footpegs from their respective brackets. The pins are held in place by a metal circlip on the bottom portion of the pin. Simply wedge an appropriate sized screwdriver into the slots and pry the circlip off of the pin. Before you remove the pin from the bracket, rotate the footpeg to the upper stop and see where your starting point is. It should look something like this:
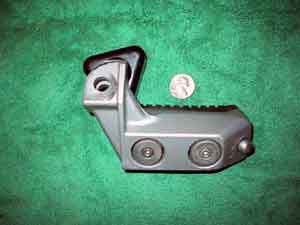
Then, pull the pin from the bracket. On the left side of the motorcycle, you can do this quite easily. On the right side, you will have to remove a black plastic cap in order to work the pin out. You'll see which one to remove as you attempt to extract the pin - the head will hit the plastic cap. Once free of the bracket, examine the footpeg and decide how much material you're going to remove. In the picture below, I drew a line indicating how much metal I would initially grind away:
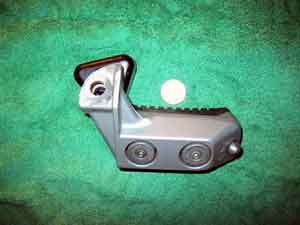
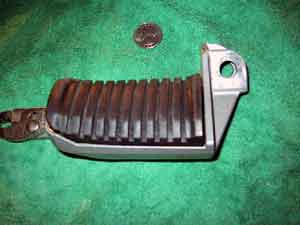
Also note that you'll need to remove a small amount of material on the front side of the peg mount in addition to the rear side that I have marked above. After completing the initial attempt, temporarily remount the peg in the bracket. Don't bother with the circlip or the spring as you're only checking how effective your work was. Move the footpeg to the up position and see if you need to remove more material. Complete as many cycles of grinding as it takes to make you happy. For me, it took about four times before I was satisfied that the peg was rotating as high as possible. The finished product should look something like this:
Remount your footpeg and attach the circlip. Don't forget to place the straight end of the spring into the hole in the bracket. Otherwise, your spring will have no tension and will not do it's job. Upon completion, the finished product should rotate much higher than the stock configuration. Hopefully, this will eliminate some or all of the stress placed upon it when your pride and joy is laying on the ground, thus protecting at least some of your expensive hardware.
|


